ASE-1119 Temperature Controlled Soldering Station

AKTAKOM ASE-1119 Temperature Controlled Soldering Station
Click an image to enlarge
Brand: AKTAKOM
Manuals: 
User's Manual (383.8 Kb)

Retail price: $32.00

Depending on a destination shipping cost may vary.
Free shipping for orders over $450
on items weighting under 20 lbs
(certain restrictions apply!)

See shipping page for international rates
or contact sales@tmatlantic.com

In stock

Buy Add to cart

AKTAKOM ASE-1119 Temperature controlled soldering station is used in the fields of electronic research, teaching and production, especially in the repairing and soldering on the electronic appliances and communication equipment.

AKTAKOM ASE-1119 soldering station (analog of ZD-919) combines ease of use with high reliability.

Specifications

  • Channel: 1 assembling channel
  • Analog control
  • Max. station power: 48W
  • Temperature range: 302°F - 842°F (150°C - 450°C)
  • Max. power of the soldering iron: 48W
  • Max. voltage of the soldering iron: 24V
  • Ceramic heating element
  • Soldering iron handle is covered with soft cool-touch silicone material

Accessories:

  • Soldering station
  • Soldering iron with a tip
  • Soldering iron holder
  • Tray with a sponge for cleaning
  • User manual

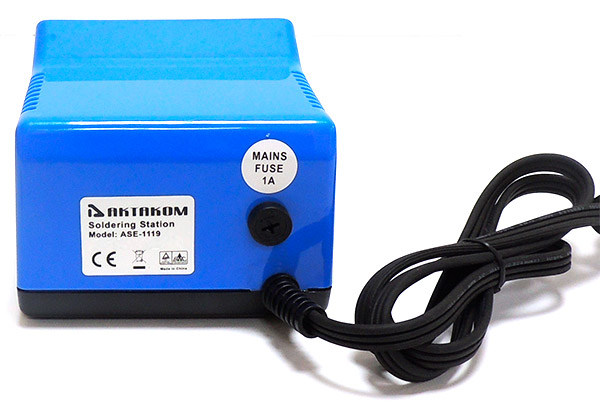
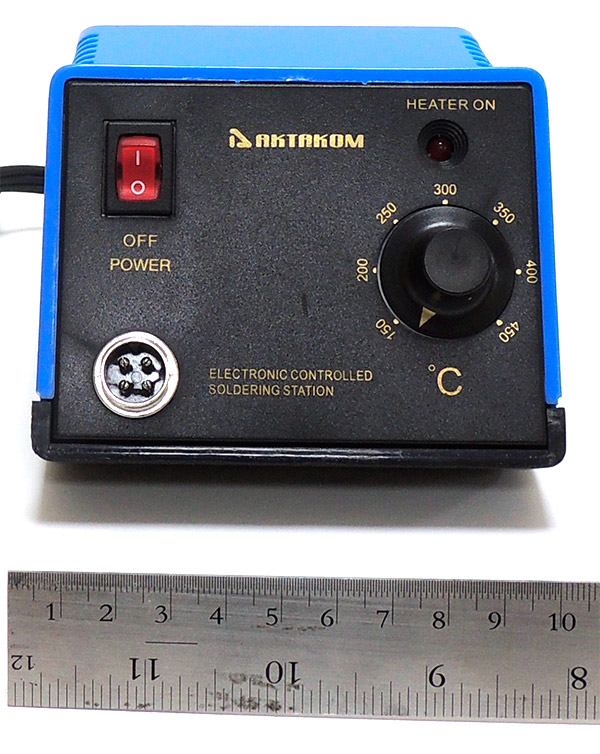
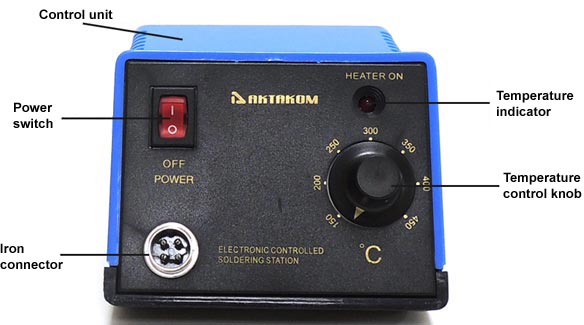
Controls of AKTAKOM ASE-1119 Soldering Station

Controls of AKTAKOM ASE-1119 soldering station

Safety instructions

Take care of yourself!

  1. Please read user manual carefully before using the instrument.
  2. Do not use the device if there is visible damage.
  3. Repair and maintenance of the device can be done only by a qualified specialist of the service center.
  4. Before connecting the instrument to the electrical network, observe all known precautions, and make sure that the grounding system is to avoid electric shock.
  5. Use only those accessories that are intended for use with this device.
  6. While working, do not touch the metal parts near the tip of the soldering iron.
  7. After completion of the work, it is necessary to install the soldering gun in the regular holder of the soldering gun.

Safety instructions of ASE-1119 soldering station

The construction of the soldering station meets Protection Level I.

Ensure the earth conductor is not disconnected and the product is only connected to earthed sockets.

Keep electrical appliances and accessories away from children!

Never use the product immediately after it has been brought in from the cold into a warm room.

Condensation might destroy your device; Wait until the product is at room temperature before use.

Never touch the appliance with damp or wet hands, there is the risk of a dangerous electrical shock.

Make sure to have sufficient ventilation while soldering, solder or solder flux can be harmful.

The power cables (power cable and cable to soldering iron) have to be protected against heat and sharp edges.

Wear appropriate protective clothing and safety goggles while soldering.

Do not touch any other area but the handle when the soldering iron is working. The temperature is very high!

When the device can no longer be operated safely, disconnect it immediately and secure it against being operated unintentionally.

It can be assumed that safe operation is no longer possible if:

  • the device exhibits visible damage
  • the device no longer works
  • it has been stored for a long time under unfavorable conditions
  • the device was exposed to extraordinary stress caused by transport.

Operation instructions

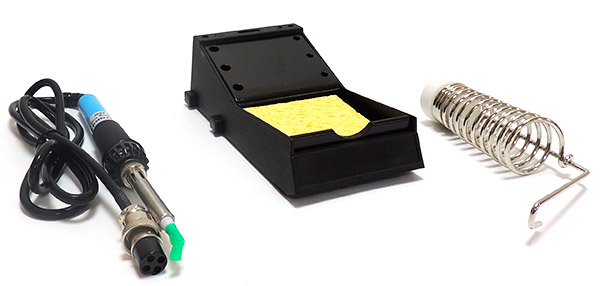
1. Unpack the soldering station and check all parts. Damaged parts may not be put in to operation.

2. Put the holding rack for the soldering iron sideways in the soldering station, wet the cleaning sponge in the sponge rack with water.

3. Put the soldering iron tin the holding rack

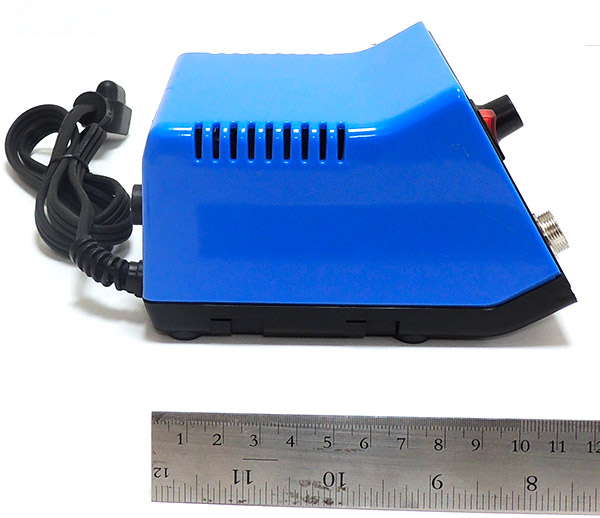
Place the soldering station on a solid and dry surface

4. Connect the mains plug to a socket and turn on the soldering station by using the power switch (l=ON / O=OFF). When turned on, the power switch is lit.

Always put the soldering iron on the holding rack when it is heating up or during breaks from soldering.

Make sure the contracts for soldering on the work place are clean.

Only use solder for electronics. Acidic solder can damage the soldering tip or the work piece.

Regulate the desired temperature of the soldering iron with the adjusting knob.

The color-coded areas are equal to following temperatures:

Yellow — approx. 150°C

Orange — approx. from 150 to 270°C

Red — approx. from 270 to 480°C

For lead solder choose the start of the first red segment (approx. 270-360°C), for silver solder use the beginning of the second red segment (approx. 320-420°C).

For larger soldering tip adjust the temperature up wards to perform the soldering as fast as possible and as long as necessary.

Lower the temperature during breaks, this saves energy and extends the durability of the soldering tip.

Wait about 2-3 minutes until the soldering tip reaches the adjusted temperature, test the temperature by touching the soldering tip with solder, if the solder melts away easily you can start soldering.

Tin the hot soldering tip with solder; wipe off excessive solder on the wet cleaning sponge.

Heat up the soldering location with the soldering tip and add solder.

Let the soldering point cool down.

Clean the soldering tip on the wet sponge after each soldering.

Afier finishing the soldering, put back the soldering iron in the rack and turn off the soldering station at the main switch.

Do not file off the soldering tip, or it will be damaged.

Never touch the hot soldering tip.

Let the soldering iron cool down after use.

The soldering iron may not be dunked into water.

During breaks, the soldering iron has to be placed in the holding rack.

1. Handle the heated soldering iron with extreme care, as the high temperature of the iron can cause fire or painful burns.

2. The first time you use the solderhg iron, it may smoke slightly as the heating element dries out. This is normal and should only last for approx. 10 minutes.

3. Never file the specialy-plated tip.

Frequently Asked Questions

  • Why a «de-tinned» tip fails to work?
  • How to clean the tip?
  • How to care and use of the soldering tip?
  • What temperature should use for soldering?
  • How to replace the soldering tip?

  • Why a «de-tinned» tip fails to work?

    A de-tinned tip is one which cannot wet with solder. This exposes the plating to oxidation and degrades the heat transfer efficiency of the tip.

    The de-tinning is caused by:

    1) Failure to keep the tip covered with fresh solder while not in use.

    2) High tip temperatures.

    3) Insufficient melting in soldering operations.

    4) Wiping the tip on dirty or dry sponges and rags (Always use a clean, wet, industrial grade, sulfur-free sponge).

    5) Impurities in the solder, iron plating, or on the surfaces to be soldered.


    Up

    How to clean the tip?

    Caution! Never file the tip to remove oxide.

    1. Set the temperature to 250°C.
    2. When the temperature stabilizes, clean the tip with the cleaning sponge and check the condition of the tip.
    3. If there is black oxide on the solder-plated portion of the tip, apply new solder (containing flux) and wipe the tip on the cleaning sponge. Repeat until the oxide is completely removed. Coat with new solder. The solder protects the tip from oxidation and prolongs the life of the tip.
    4. If the tip is deformed or heavily eroded, replace it with a new one.

    Up

    How to care and use of the soldering tip?

    Tip’s temperature High soldering temperatures can degrade the tip. Use the lowest possible soldering temperature. The excellent thermal recovery characteristics ensure efficient and effective soldering event at low temperatures. This also protects the sensitive components from thermal damage. Cleaning Clean the tip regularly with a cleaning sponge, as oxides and carbides from the solder and flux can form impurities on the tip. These impurities can result in defective joints or reduce the tip's heat conductivity. When using the soldering iron continuously, be sure to loosen the tip and remove all oxides least once a week. This helps prevent reduction of the tip temperature. When not in use Never leave the soldering iron sitting at high temperature for long periods of time, as the tip's solder plating will be covered with oxide, which can greatly reduce the tip's heat conductivity. After use Wipe the tip and coat it with fresh solder. This helps to prevent tip oxidation.


    Up

    What temperature should use for soldering?

    600 - 650°F (316 - 343°C) is a good place to start for lead-based solder and 650 - 700°F (343 - 371°C) for lead-free solder.

    Note: if clots form, the temperature is too low.


    Up

    How to replace the soldering tip?

    Note: Tip replacement or cleaning should be done only when the iron is at room temperature or below. The tip can be changed or replaced simply by unscrewing the knurled nut barrel assembly.

    The station must be switched off and allowed to cool before and during this operation, as damage may occur if the system is left on without the tip inserted, after removing tip, remove any oxide dust that may have formed in the tip retaining area of the barrel. Be careful to avoid getting dust in your eyes. Replace the tip and screw the retaining knurled nut barrel assembly using only hand pressure to tighten. Pliers should only be used to tighten the nut if loosening occur when the iron is hot to avoid burning your fingers. Do not over tighten as this would damage the element.


    Up

    ASE-1119 Soldering Station Unboxing

    La estación de soldadura con control de temperatura ASE-1119 se utiliza en los campos de la investigación, enseñanza y producción electrónica, especialmente en la reparación y soldadura de aparatos electrónicos y equipos de comunicación.

    Back to the section
    We recommend
    AKTAKOM - the Best in Test Award Winner!
    Site map|Privacy policy|Terms of Use & Store Policies|How to Buy|Shipping|Payment|© T&M Atlantic, Inc., 2010-2024