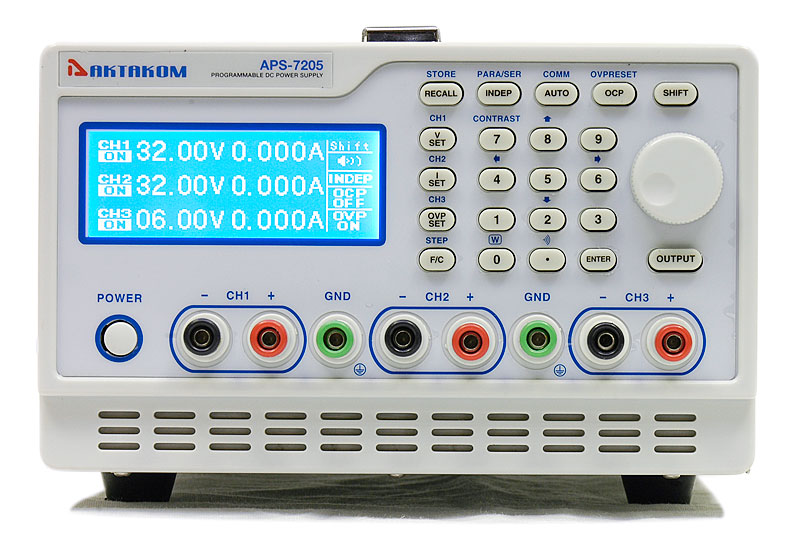
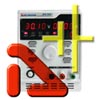
AKTAKOM APS-7205 is a high performance remote controlled programmable regulated DC power supply. It has a clear LCD panel with simultaneous output/parameter view for better reading of the output and programming.
There are 3 channels, output regulated voltage of 0
32 V, output current of 0
5 A.
AKTAKOM APS-7205 programmable DC power supply (analog of PPS3205T-3S) differs from other similar benchtop power supplies by wide capabilities of local and remote control through AKTAKOM Power Manager software.
APS-7205 programmable DC power supply is capable of operating in several modes:
 Manual control mode.
 Control mode with the built-in memory use. Including the use of up to 90 memory cells to store preset voltage and current.
 Control via RS-232/USB
 Aktakom Power Manager Express 3 software allows users to remotely control their power supply via PC. It features Measure, Set Up and Initialization functions, as well as, automatic switching off of the outputs of the device at the end of the program. The program follows basic configurations and some features of operation as the device control panel.
The software is multifunctional and interactive, its pre-set function allows for faster set up and flawless changes. Besides functionality the software has "News" button shows or hides Aktakom news feed. "Info" button displays the information about the program and connected device, and of cause the "Help" button for those who are stuck and need a little help. "Voice" button selects a Windows voice guide that will announce application events to you. Select the "No voice" option to disable the voice guide.
Features
- Full digital programmable interface
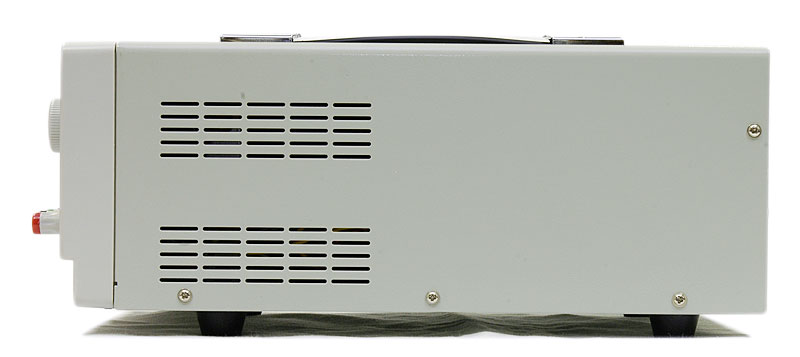
- Compact and lightweight package
- Precession resolution
- Low Ripple and Noise
- Quick Response time
- High stability. Low Drift (<100ppm)
- Over-voltage, over-current, over temperature protection
- Built-in buzzer for warning alerts
- Serial and Parallel operation
- 100 groups setting storage
- Alterable display mode
- Intelligent window interface
- Intelligent fan control
- Standard Interface: RS-232, USB
Control via PC: APS-7205
Minimum computer requirements: Computer used for the device work should meet the following minimal requirements: - USB-port; - Installed Windows 7 or higher operating systems.
To connect the device its necessary to:
- Press [SHIFT][COMM] into the interface of communication setting and use knob to switch to the corresponding parameters, which are to be revised and setting. Set ADDR: 001, BAUD: 19200, DATA: 8.

Fig.1 Communication Interface
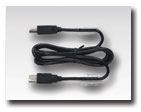
Connect the device to the PC USB-port by A-B type cable subject to the connection with the USB-port.
Software installation
Download the software.
After the installation process is completed there will be a program group created with shortcuts for the program and for its Help. You may start them using Start menu. Before using the device its necessary to install a USB interface driver. All necessary files will be put into the program working folder, System subfolder, at the software installation.
FTDI USB Driver (Virtual COM Port)
The virtual COM port driver is installed automatically when you install the application, but you can also install it manually later.
All necessary files are located in the program working directory, for example: C:\Program Files\AKTAKOM\AKTAKOM Power Manager Express 3\Driver
INSTALLATION: Find and run CDM21228_Setup.exe
If you correctly installed the hardware and software components of the system, when you start the program, it will detect the operating device itself and inform you about the successful connection. Otherwise, the program will report that the device cannot be found and will work offline. This may be due to the fact that you have not connected the device to the computer port correctly or have not installed the necessary drivers, as described in the sections above.
How to use the program
After starting the application, the main window will open:

Fig.2 Aktakom Power Manager Express3 Main Window
Upper panel buttons of the main window:
"Exit" button terminates the program operation.
The button with a clock icon shows or hides the clock display on the keypad.
"Hints" button shows or hides the keys caption text.
Button "Turn OFF when closed" - enables/disables the mode of automatic switching off of the outputs of the device at the end of the program.
"News" button shows or hides Aktakom news feed.
"Info" button displays the information about the program and connected device.
"Help" button recalls this help file.
The Initialization box is used to connect the device to the program. If the device was already connected to the PC via USB when the program was started, the program will connect it automatically. If you connected the device later, click the Connect button. After successful connection of the device, the name and serial number of the device will be displayed in the initialization block. Otherwise, an error message will be displayed there.

Fig.3 Aktakom Power Manager Express3 Initialization box
Use Channel buttons to select the channel to control and display.

Fig.4 Aktakom Power Manager Express3 Channels
The Measure box shows the current state of the device - switching on outputs, output voltage and current, stabilization mode - by voltage or current.

Fig.5 Aktakom Power Manager Express3 Measure
The Set Up box allows you to control the parameters of the device. Panels with shortcut buttons are configured using the dialog Pre-set settings.
Button Output - turns on / off the outputs of the device.

Fig.6 Aktakom Power Manager Express3 Set Up/Output
Use the Independent/Serial/Parallel buttons to select the output operation mode.

Fig.7 Aktakom Power Manager Express3 Independent/Serial/Parallel
Presets list edit
The appearance of the dialog box in the picture below.

Fig.8 Aktakom Power Manager Express3 PreSet
The list of presets (shortcut buttons) is a list of Voltage or Current values, which can be set on the device with one touch". In dialogue editing presets in addition to the list itself, the program displays the following buttons:
Reset list to default - return the contents of the list to default values.
-
Change - replace the selected line of the list with the entered value.
-
Add - add a new value to the list.
-
Delete - remove the current line from the list.
-
Cancel - close the dialog without saving changes.
-
OK - save changes and close the dialog.
Safety Precautions
- Handling or storage, the use of pressure or vibration should be avoided.
- Without a professional technician, you should not dismantle the machine by yourself when it does not work in order not to result in a change in its characteristics.
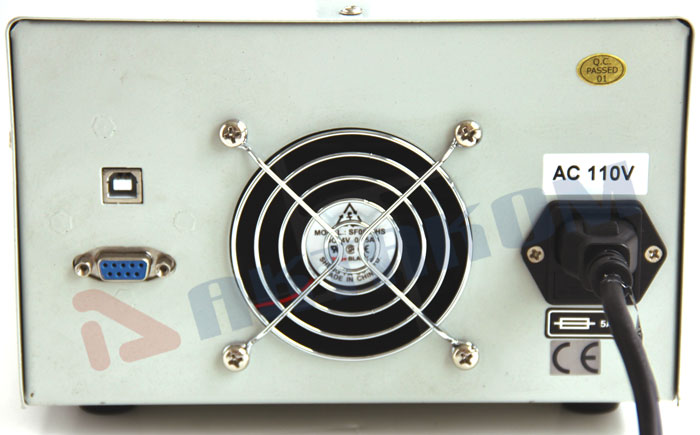
- Note the use of power supply 230V/115V and fuse specifications instructions.
- The machine uses a three-linear power supply, to ensure that the machine casing and power have good grounding protection.
- To avoid the above +10 V voltage outside the signal output.
- Range of operating environment 0 °C ~ 40 °C; and should be avoided at high temperatures, high humidity, and magnetic interference of the operation.
Power supply controls
| 1 | POWER | Press this button to make the power on |
| 2 | DISPLAY | The display Settings of voltage and current, output voltage and output current, setting and output condition |
| 3 | CHI OUT | CHI output terminals |
| 4 | CH2 OUT | CH2 output terminals |
| 5 | CH3 OUT | CH3 output terminals |
| 6 | GND Terminal | Ground terminal connecting to CASE |
| 7 | Rotary Encoder | Shuttle knob: it can immediately adjust the output voltage and current steppingly |
| 8 | V SET (CHI) | Set Output voltage: Switch to channel 1 by pressing [SHIFT] [CHI] to proceed group setting |
| 9 | I SET (CH2) | Set Output current: Switch to channel 2 by pressing [SHIFT] [CH2] to proceed group setting |
| 10 | OVP SET (CH3) | Set OVP value: Switch to channel 3 by pressing [SHIFT] [CH3] to proceed group setting |
| 11 | F/C (STEP) | Switch input of shuttle knob to be macro-tuning and micro-tuning; you can increase or decrease the steps of the order in the mode of shuttle by pressing F/C |
| 12 | RECALL (STORE) | Recall the stored information. Proceed information storing and editing by pressing [SHIFT][STORE], |
| 13 | AUTO (COMM) | Single click namely after entering automatically execute mode. Click [SHIFT] [COMM] into the interface of the communication setting |
| 14 | INDEP
(PARA/SER) | Press the [SHIFT][PARA/SER] into parallel selection screen,
Single click [INDEP] key to independent output mode |
| 15 | OCP
(OVP RESET) | OCP on/off open or close OCP
Press [SHIFT][RESET] key to clear over-voltage protection |
| 16 | SHIFT | The second function selection, clear the selected channel while pressing it. |
| 17 | CONTRAST | Proceed the contrast adjustment of the display by pressing [SHIFT][C0NTRAST]. The rotary shuttle knob can adjust display contrast; press [ENTER] to exit setting. |
| 18 |  | Turn on/off the buzzer by pressing [SHIFT] [ ] |
| 19 | ↑ | Move the cursor upward by pressing [↑] in the condition of storage |
| 20 | ↓ | Move the cursor downward by pressing [↓] in the condition of storage |
| 21 | ← | Move the cursor on the left by pressing [←] in the condition of storage |
| 22 | → | Move the cursor on the right by pressing [→] in the condition of storage |
| 23 | OUTPUT | Turn on or off output by pressing the knob; when you select a channel, you can turn on/off the corresponding channel; when you select no channel, you turn on/off all channels. |
| 24 | 0~9
".", ENTER | Data entry, ENTER Value output |
| 25 | [W], "0" | Press [SHIFT] [W] to restore factory settings |
| 26 | AC Power Socket | AC Power Socket AC power input terminal |
| 27 | Cooling Fan | Cooling Fan |
| 28 | Interface | RS-232C communication interface |
| 29 | USB interface |